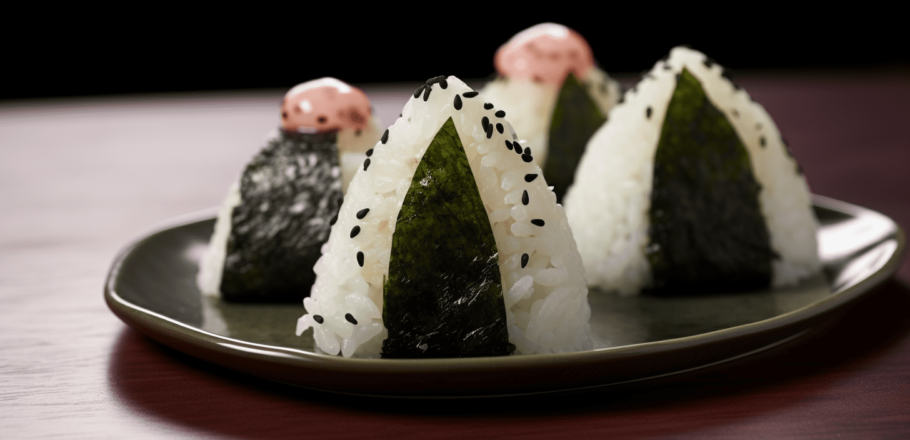


Have you ever tried making Onigiri at home? These Japanese rice balls are a great alternative to sandwiches. We’ve prepared a detailed Onigiri recipe to assist you in preparing them quickly and easily. Let’s explore how to make these delightful Japanese rice balls together.
Onigiri, a delightful Japanese snack with a rich history and endless flavor possibilities, brings a taste of tradition and simplicity to your kitchen. The versatility of onigiri allows you to explore various fillings, creating a personalized experience with every bite. This easy-to-follow recipe captures the essence of onigiri, making it accessible for both beginners and seasoned home cooks. Embrace the art of crafting these rice balls, and elevate your snacking game with a touch of Japanese culinary charm.

What is Onigiri?
Onigiri, also referred to as o-musubi or nigirimeshi, are Japanese rice balls crafted from cooked or steamed rice. They can be seasoned with salt or filled with various ingredients. These are commonly enjoyed in Japan, either homemade or bought from convenience stores, making for a simple and convenient snack, ideal for a quick lunch.
It’s important not to mistake onigiri for sushi. The key distinction lies in their preparation – sushi requires sushi vinegar to season the rice, whereas onigiri are made with plain rice.
Why We Love This?
Onigiri holds a special place as a beloved snack for its simplicity and versatility. These Japanese rice balls offer a quick and straightforward snack option, easily customizable with various fillings. Onigiri allows for endless possibilities, making it a favorite choice among snack enthusiasts. You can eat them warm, cold, or at room temperature.
Onigiri’s History
Onigiri is a traditional Japanese comfort food with a rich history dating back centuries. As one of the earliest portable meals, this simple snack was not only convenient to eat on the go but also helped preserve fresh rice for extended periods of time.
Historical documents cited by Whitelaw highlight onigiri as part of ceremonial gifts among nobles and as part of military rations. In addition, the first school lunch program included onigiri.
Over time, onigiri evolved to include various fillings such as pickled plums (umeboshi), salted salmon, seaweed (nori), and other ingredients. The one thing that has never changed is the basics of making onigiri. Today, onigiri remains a popular and cherished food in Japan and around worldwide.
How to Make Onigiri
Making onigiri is a simple and enjoyable process that doesn’t require complicated culinary skills. With its straightforward technique and basic ingredients, making these Japanese rice balls is accessible to everyone. Below is a detailed recipe that provides a comprehensive guide to making onigiri. Let’s explore the main steps and take a closer look at the key ingredients.
The Ingredients You’ll Need
- Japanese short-grain rice – A predominant rice variety used in various Japanese culinary preparations, and is often referred to abroad as sushi rice.
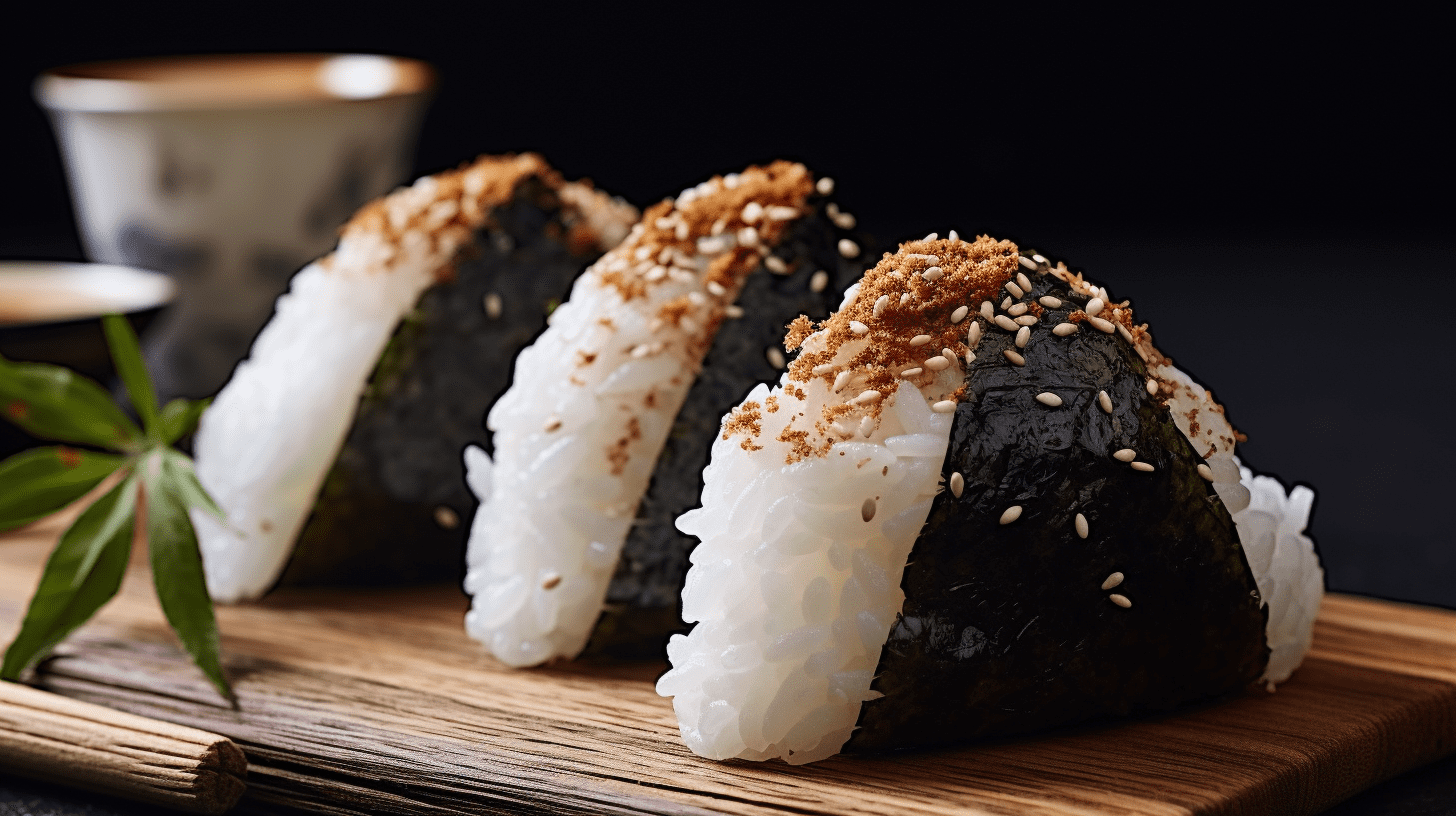
- Nori Seaweed – This is the thin seaweed sheet commonly utilized to wrap sushi. You can find nori online at Asian grocers or well-stocked grocery stores. They can be in full-size squares or in mini pre-cut strips.
- Bonito shavings – These are dry fish flakes. Use them as the filling for your onigiri.
The Cooking Steps
- Cook short-grain rice according to the recipe.
- Use salted water to wet your hands and divide rice into 8 equal portions.
- Take up one portion of rice in your hands and divide it in half.
- Make a dimple in the rice, place the ingredients inside, and cover with the remaining portion of rice.
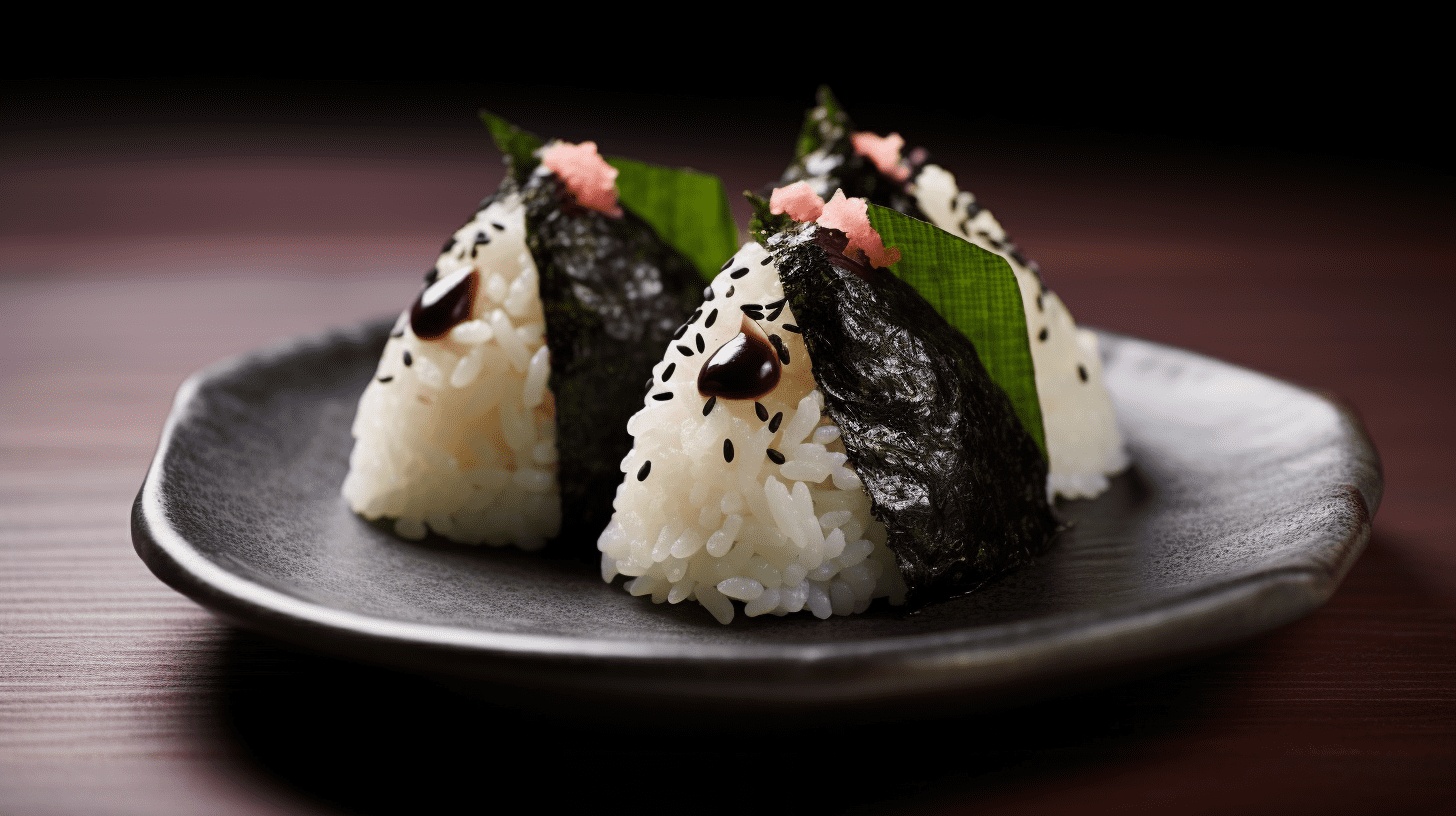
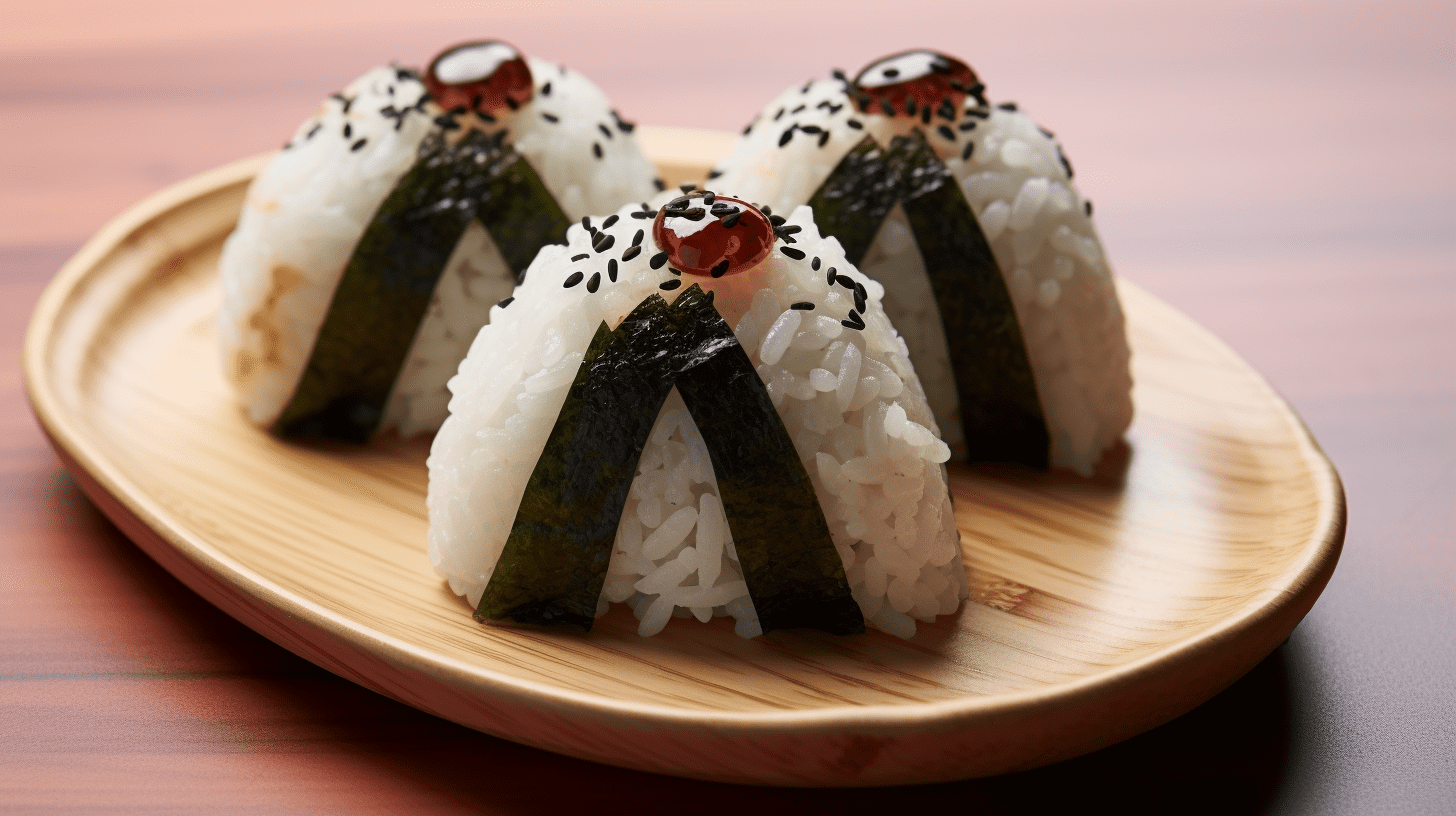
- Squeeze the rice into a triangle shape with your finger.
- Wrap with a slice of nori and sprinkle with sesame seeds.
Onigiri Filling & Seasoning Ideas
Onigiri can be filled with a variety of delicious ingredients, allowing for numerous flavor combinations. However, there are the most common fillings that offer a burst of unique flavors. Give them a try, and you won’t be disappointed!
- Simmered kombu seaweed
- Salted salmon or salted cod roe
- Shredded chicken and mayonnaise
- Canned tuna and mayonnaise with a spicy chilli seasoning
- Pickled plum – also known as umeboshi
- Gomashio – black sesame salt
- Ume Goma Shio – plum sesame salt
Cooking Tips
- It’s best to use freshly cooked rice for onigiri. The rice should be warm when making onigiri. This will help the rice stick together better.
- Moisten your hands and sprinkle them lightly with salt. This will prevent the rice from sticking to your hands. Salt also enhances the flavor of the onigiri and makes them last longer.
- Avoid excessive force while shaping the onigiri. You should make sure that the rice holds together without being squeezed too tightly.
- Cover the rice and formed rice balls with plastic wrap. This prevents it from drying out too quickly.
FAQs
Why does my nori get soggy and wet?
When nori absorbs moisture, it tends to become damp, which is normal. To maintain the crispness of your onigiri, it’s best to wrap the nori just before eating. Store the nori in a resealable bag to maintain its freshness and texture.
Why does my nori get gummy?
When making onigiri, choose higher quality nori. It is better to use nori imported from Japan.
How can I store onigiri?
To store onigiri, wrap them individually in plastic wrap or place them in an airtight container. They will keep in the refrigerator for up to a day. If you plan to store them for a longer period, store them in the freezer. Wrap them tightly in plastic wrap and place them in an airtight container or resealable freezer bag.
A good side dish option presented in an interesting way. You can pair onigiri with eggs or salmon for breakfast, with any main course for lunch, and also with seafood or fish for dinner (if your goal is not weight loss). However, if you are watching your figure or on a weight loss program, it's best to avoid rice, as well as any other carbohydrate side dish in the evening. Don't forget to add a vegetable component to your healthy plate to achieve a well-balanced meal.

1. Rinse rice in a mesh strainer until the water runs clear. Combine washed rice and 4 1/2 cups water in a saucepan. Bring to a boil over high heat, stirring occasionally. Reduce heat to low; cover, and simmer rice until water is absorbed, 15 to 20 minutes. Let rice rest for 15 minutes to continue to steam and soften. Allow cooked rice to cool.
2. Combine the remaining 1 cup water with salt in a small bowl; use to dampen hands before handling rice. Divide the cooked rice into 8 equal portions. Use one portion of rice for each onigiri.
3. Divide one portion of rice into two. Make a dimple in the rice and fill it with a heaping teaspoon of bonito flakes. Cover with the remaining portion of rice and press lightly to enclose the filling inside the rice ball. Press gently the rice to shape into a triangle; wrap with a strip of nori and sprinkle with sesame seeds. Repeat with remaining portions of rice.
Servings Per Recipe: 4 Calories: 744
* Percent Daily Values are based on a 2,000 calorie diet. Your daily values may be higher or lower depending on your calorie needs.
** Nutrient information is not available for all ingredients. Amount is based on available nutrient data.
(-) Information is not currently available for this nutrient. If you are following a medically restrictive diet, please consult your doctor or registered dietitian before preparing this recipe for personal consumption.
Powered by the ESHA Research Database © 2018, ESHA Research, Inc. All Rights Reserved


For an extra layer of umami, try adding a dash of soy sauce or a drizzle of teriyaki sauce to the rice before shaping it into onigiri. This subtle infusion of savory flavors will complement the various fillings and enhance the overall taste experience. Additionally, when experimenting with fillings, consider incorporating ingredients with contrasting textures, such as crunchy vegetables or toasted sesame seeds, to add an exciting element to each bite. Enjoy the creative journey of making onigiri, and let your taste buds savor the delightful results!